


Ultra-intuitive software for filtering and editing photos and videos. Available for MacOS and Windows. Now at Version 2024.1
Upgrade your photos and videos with instant results, professional control

CameraBag lets you instantly apply one of hundreds of beautiful presets to your photos (and videos with CameraBag Pro), and then dive deeper with ultra-intuitive professional adjustments. It's no wonder Apple awarded it the #2 Mac App of the Year and Professional Photographer Magazine called it "a revolution for photo editing."
Why Professional Photographers Choose CameraBag (7 Reasons)
What really sets CameraBag apart are powerful advanced tools that are also intuitive and easy to learn. High-bit-depth RAW support, unique curve tools, adjustment re-ordering/layering, and precise controls let you do things you simply can’t do in other editing software. Watch more.
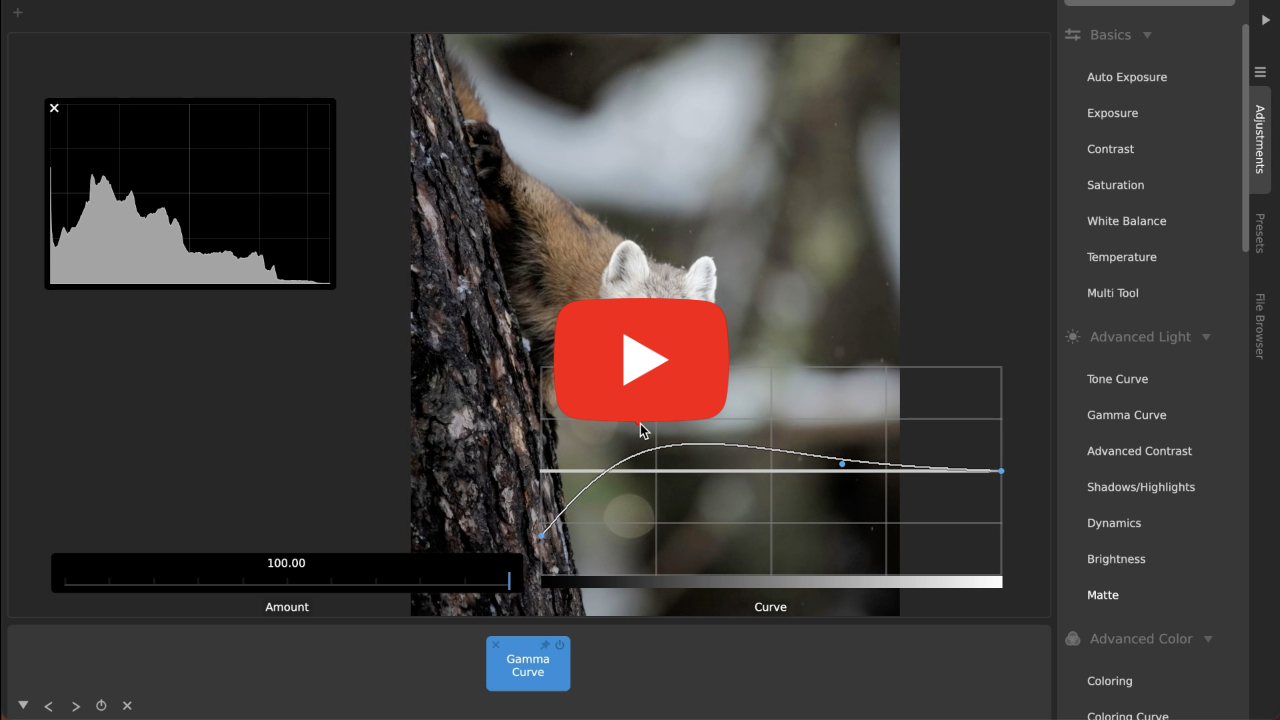
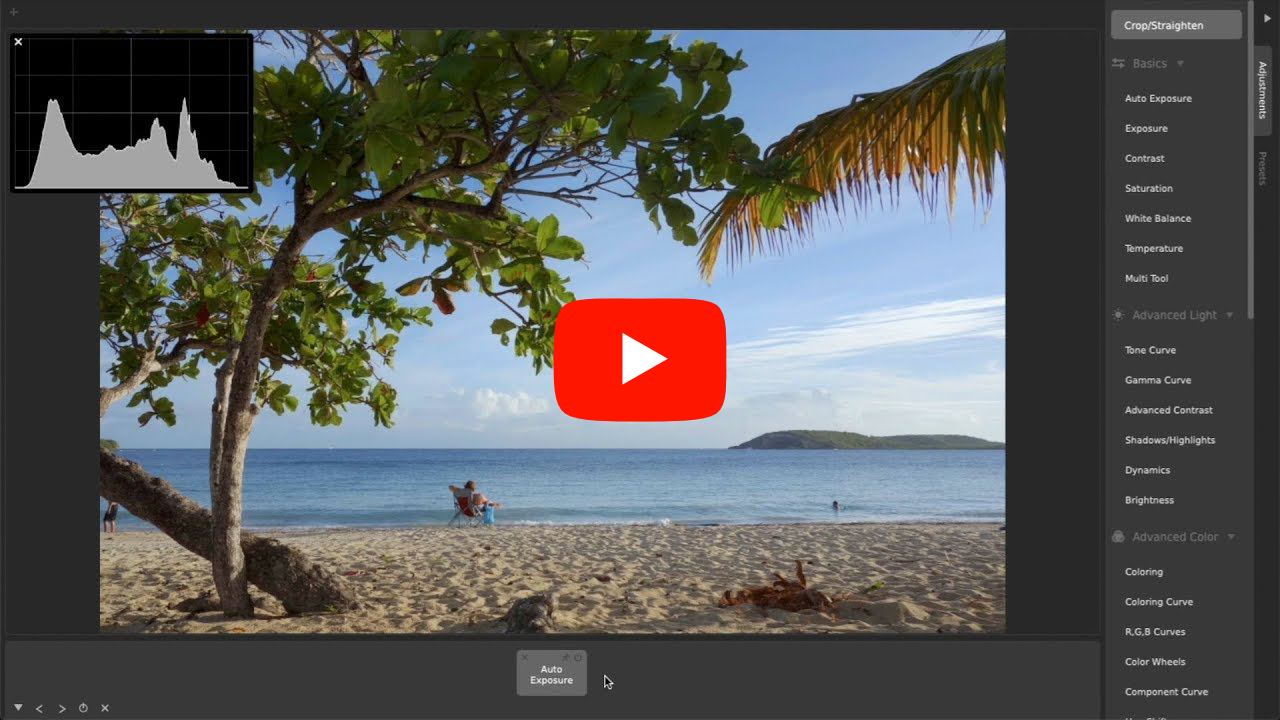
How to Adjust Brightness/Exposure in Photos (7 Pro Tricks)
From one-click Auto Exposure, to standard Exposure, Contrast, and Brightness, and on to professional Advanced Contrast, Shadows/Midtones/Highlights, Tone Curve, and Gamma Curve adjustments (each with extra options if you want!), CameraBag gives you incredible flexibility and control. Watch more.
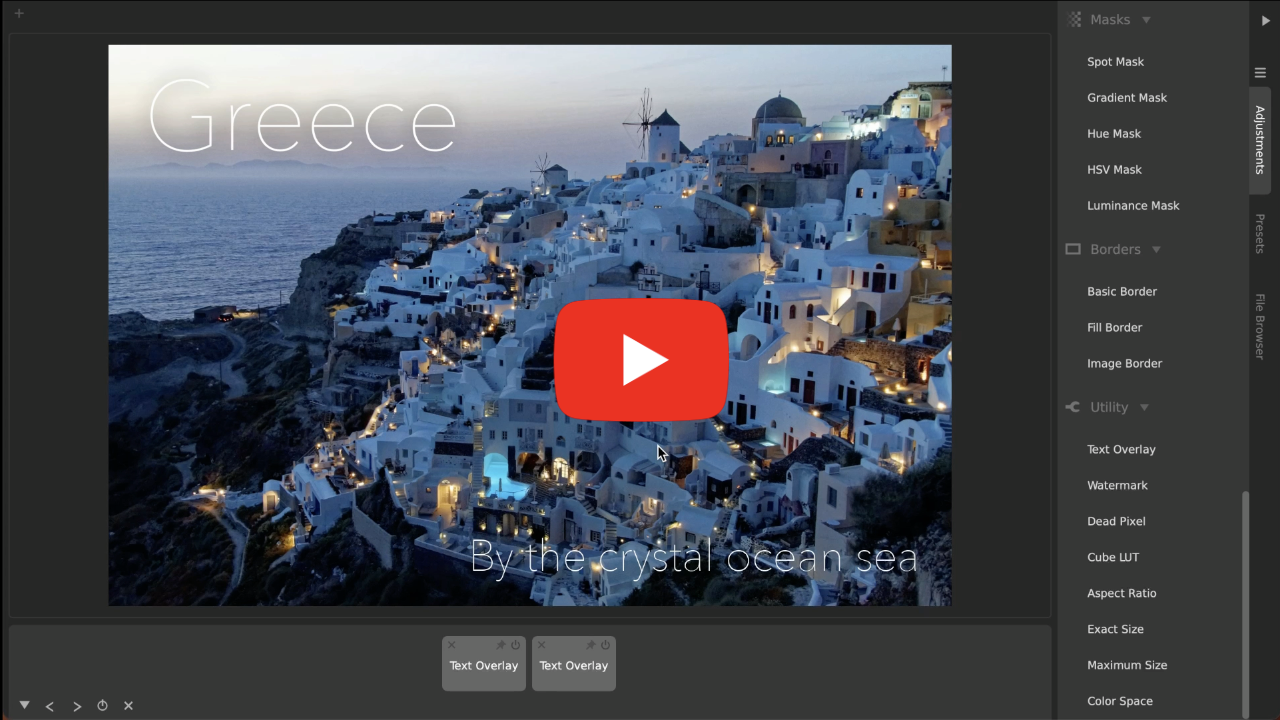
The Easiest Way To Add Text And Watermarks to Photos and Videos
CameraBag's tools are designed for simplicity, but give you advanced control when you want it. You can also apply Text Overlay and Watermark effortlessly and elegantly to whole batches of images, even when they are different sizes or proportions. Watch more.
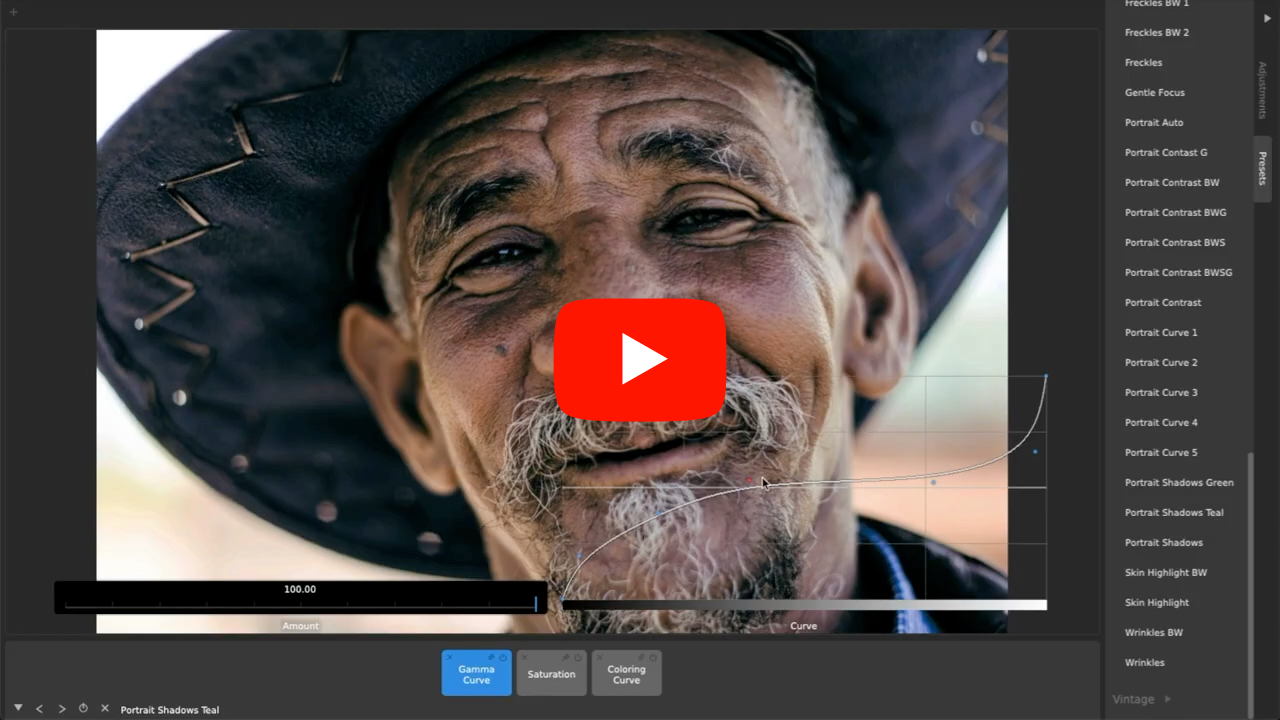
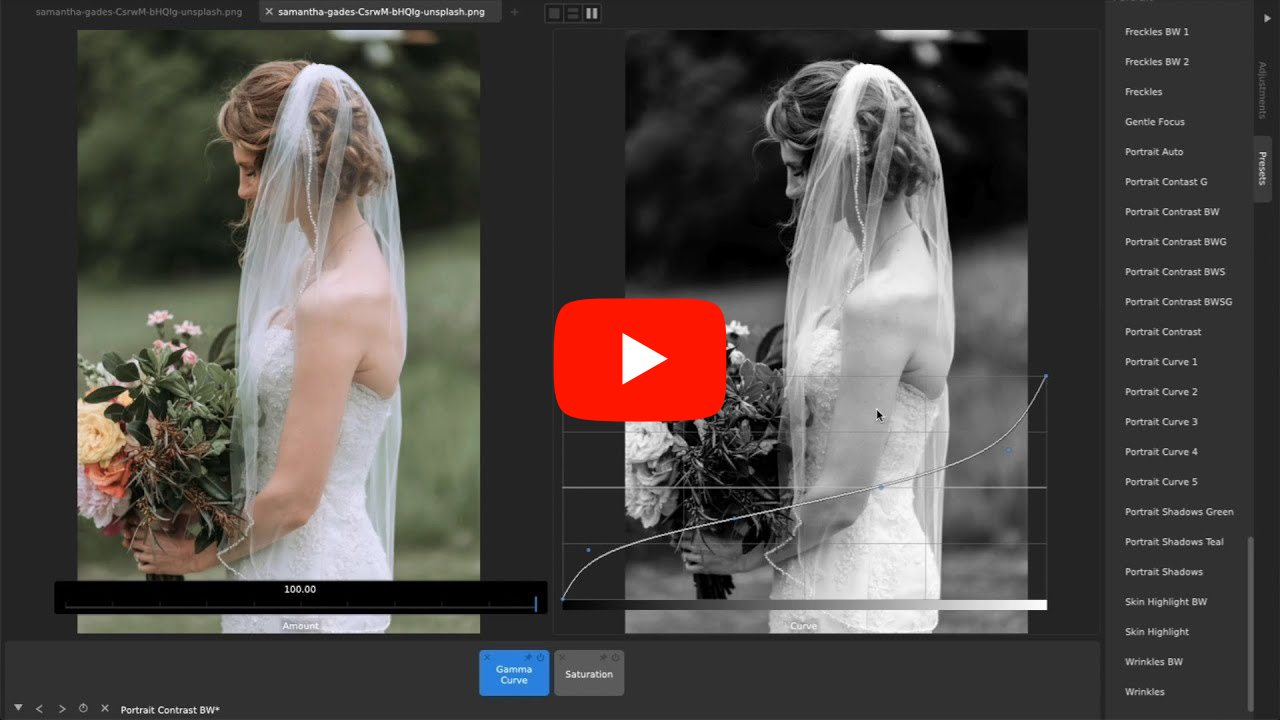
Why CameraBag is the Best Photo Editor for Portraits (5 Features)
Among the over 200 included fully-adjustable presets (including landscape, classic film emulation, vintage looks, modern photo styles, and more) are presets specifically designed for portrait photography, and other tools perfectly suited for editing portraits. Watch more.
Why CameraBag is the Best Photo/Video Editor for Social Media Marketing (7 Reasons)
Batch processing in CameraBag lets you easily apply the same adjustmetns and presets to large sets of photos and videos, including the ability to batch apply watermarks/branding, resizing, and cropping. Watch more.
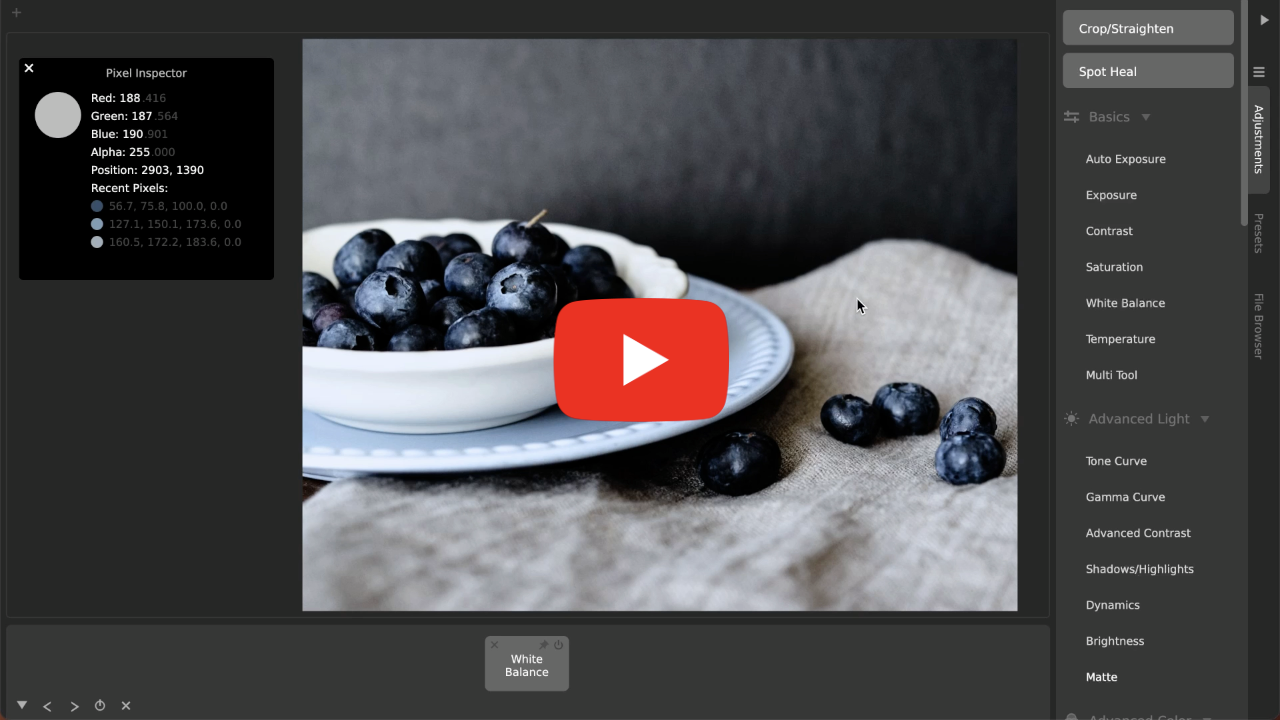
Color Correction and White Balance The Easy Way
CameraBag has a one-click Auto White Balance, a Temperature slider, a unique Coloring Curve (with additional professional settings!), and Color Wheels (often found in video editors) that you can use get the white balance and color just right on your photos and videos. Watch more.
Tips to Instantly Improve Any Photo (10 Tips)
CameraBag is non-subscription, award-winning photo editing software that lets you easily and instantly enhance your photos and videos. Watch to learn how to make beautiful images without needing to learn advanced photo editing. Watch more.
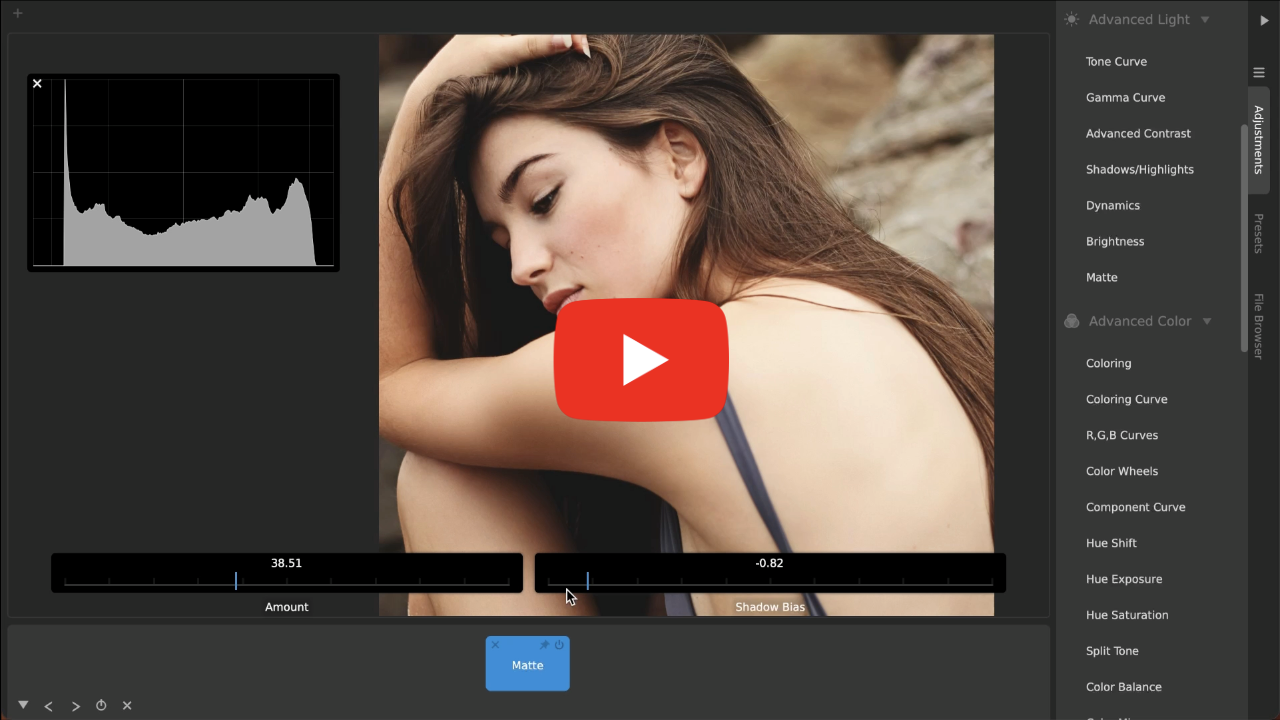
How to Get the Soft, Beautiful Matte Look on Photos and Videos
CameraBag offers a beautiful one-click Matte adjustment, as well as powerful Tone Curve and Gamma Curve tools that you can use for advanced, precise creation of a soft and beautiful look on your photos (and videos with CameraBag Pro). Watch more.
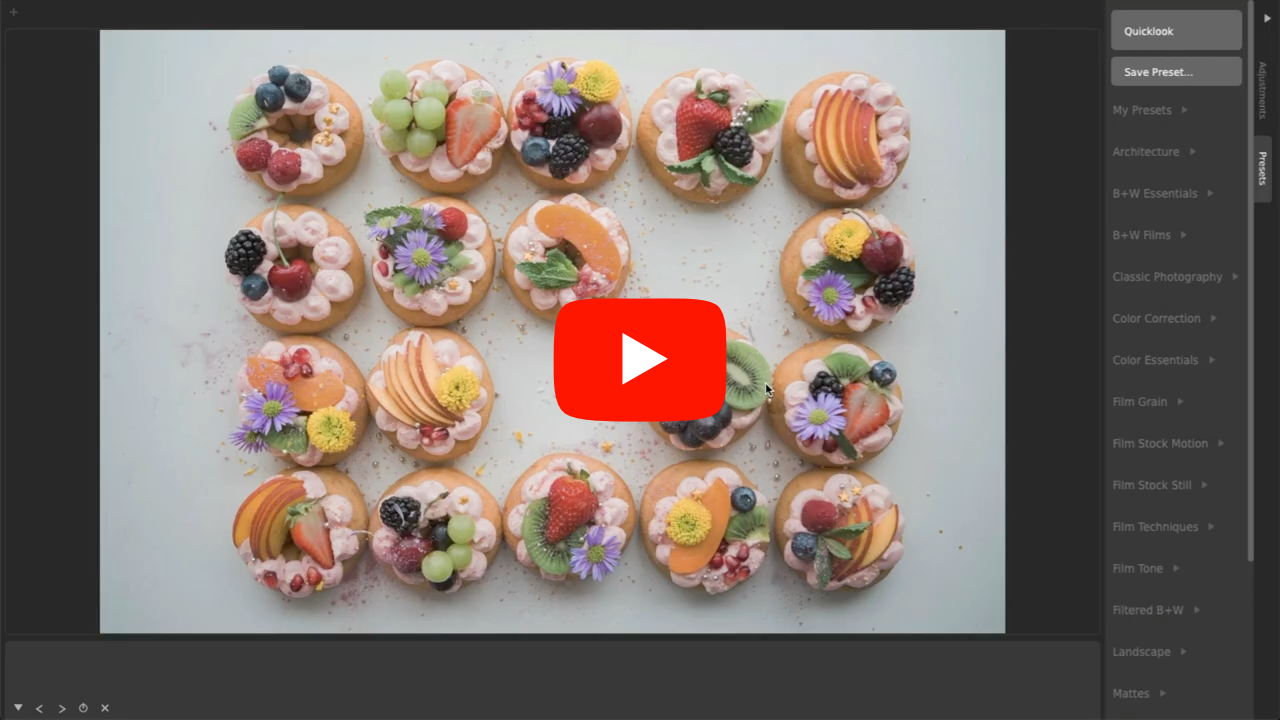
Top Photo Editing Workflows in CameraBag (5 Workflows)
CameraBag gives both novice photographers and pros powerful workflows to quickly get the look they want. Start or finish with one of hundreds of presets, or build up your own style from scratch with professional tools. Watch more.
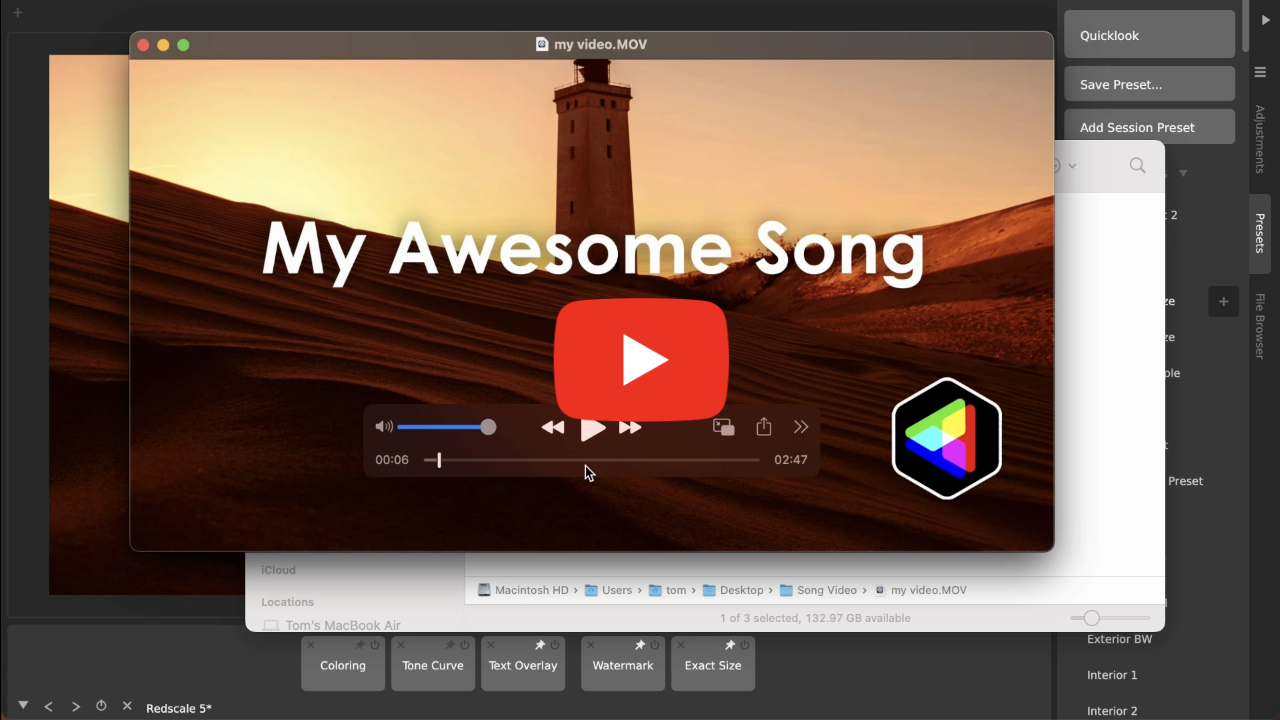
The Easiest Way To Make Videos From Audio (Upload Podcasts/Songs To YouTube!)
It’s simple to get a song or podcast ready for YouTube using CameraBag! Turn an audio track into a video in no time with the image of your choice, and you can easily add text, watermarks, and more. Plus you have all of CameraBag’s advanced editing capabilities when you want them, for exactly the look you want. Watch more.
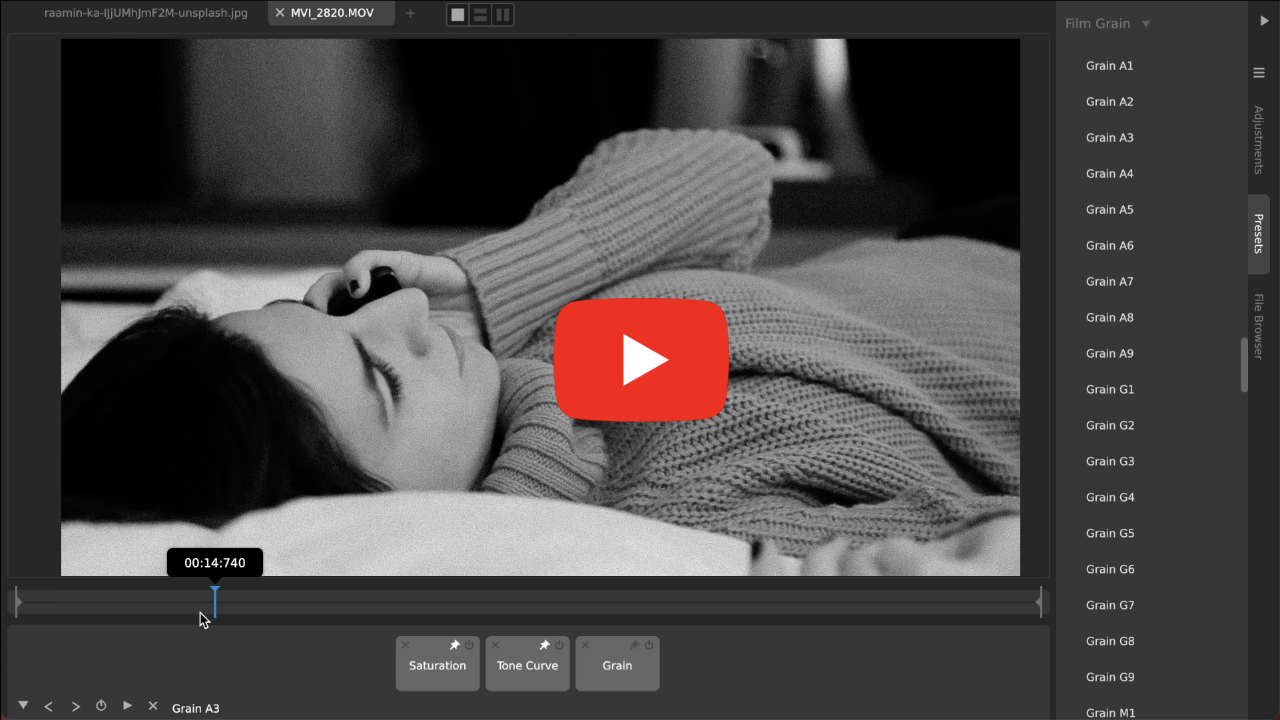
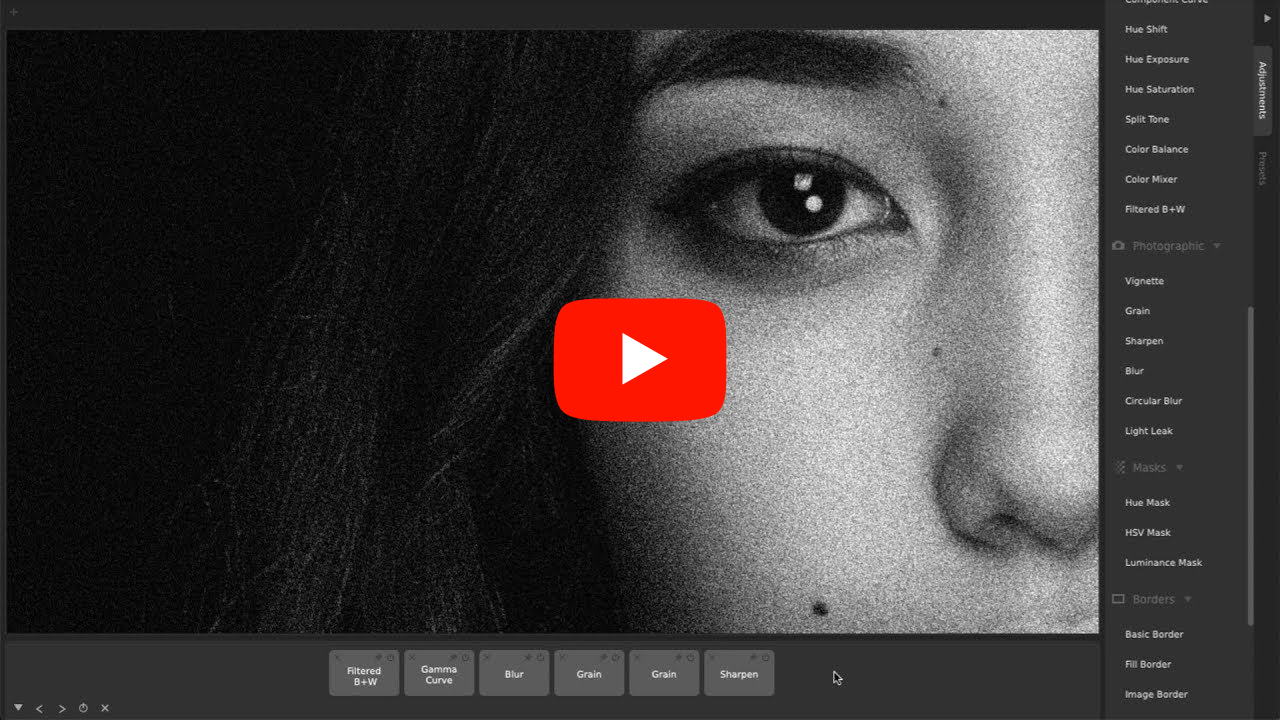
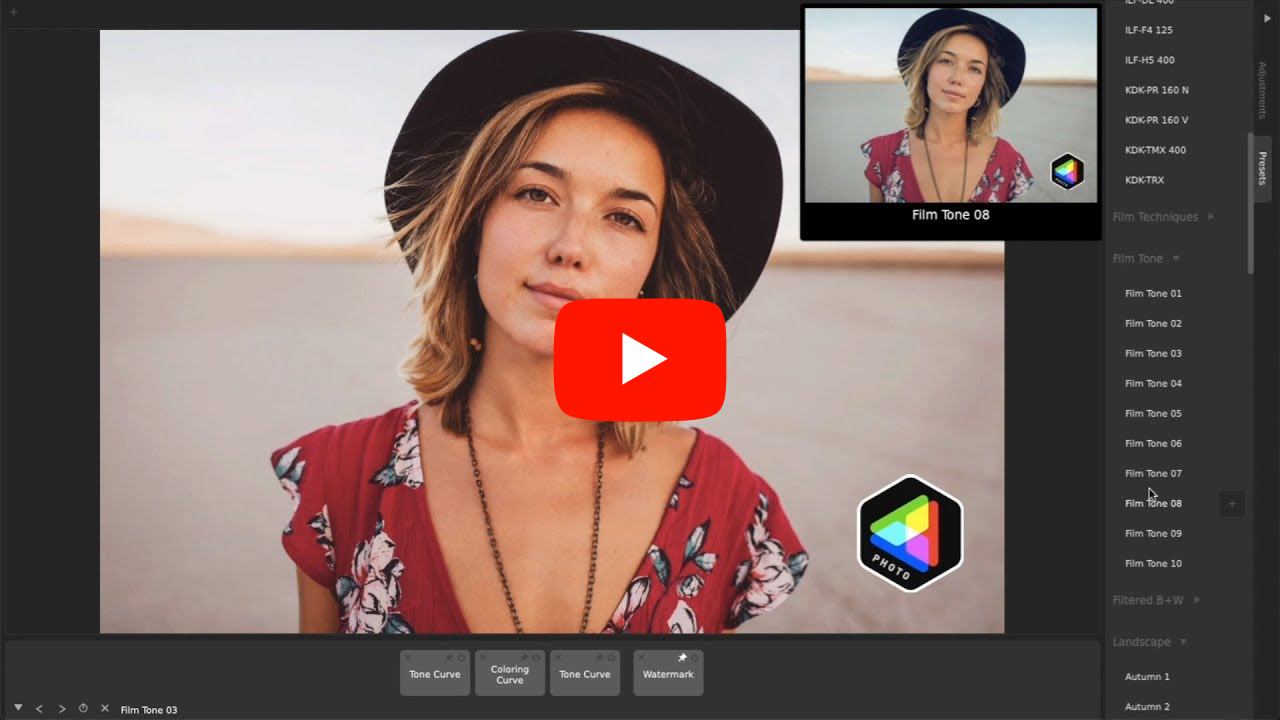
How To Make Digital Photos and Videos Look Like Film (Easy Realistic Film Grain)
CameraBag's film grain emulation isn't just an overlay of noise on top of your image; it emulates what actually happens with real film grain. Plus, it has dynamic adjustments imitating the real-world chemical characteristics that make different film grains look different, so you target any specific film grain. This works beautifully on video, as well, with CameraBag Pro. Watch more.
Why CameraBag Is The Best Photo Editor for Wedding Photography & Videos (6 Reasons)
With CameraBag Pro you can use the exact same filters and adjustments on both photos and videos, which is a dream come true for wedding photographers and videographers. CameraBag also makes comparing tons of related media across different filters a snap. Watch more.
Always Growing Through Regular Updates,
No Subscriptions
No Subscriptions
We release frequent, rolling updates to CameraBag as soon as new features are ready. Every license purchased on our site includes a FULL year of free upgrades, regardless of the version number or size of each update. Plus, no subscriptions! When you buy CameraBag, you own it.
Update period extensions can be purchased to add additional years of updates to the license. This isn't a subscription: you're always able to use any versions released before the end of your update period (including extensions to it), and you can jump back in with an update period extension at any time in the future to grab the latest features.
Update period extensions can be purchased to add additional years of updates to the license. This isn't a subscription: you're always able to use any versions released before the end of your update period (including extensions to it), and you can jump back in with an update period extension at any time in the future to grab the latest features.
Compare: CameraBag Photo vs CameraBag Pro
CameraBag Pro offers everything included in CameraBag Photo—including all its amazing photo editing capabilities—PLUS additional tools for adjusting and filtering videos.
CameraBag Photo |
CameraBag Pro |
|
|---|---|---|
| Complete Photo Editing Toolset | • | • |
| 200+ Professional Filters | • | • |
| Award-Winning Intuitive Interface | • | • |
| 96-bit Analog Engine Processing | • | • |
| Video Processing | • | |
| 20+ Classic Motion Film Stock Filters | • | |
| Filter LUT Import/Export | • |
Q&A: CameraBag vs. Lightroom
Q: Can I use CameraBag as a Lightroom alternative?
Yes! For most photographers, CameraBag can do everything Lightroom can do, and more, at a much more accessible price and without a subscription. It's a great Lightroom alternative with many advanced tools simply not available in Lightroom. CameraBag deliberately doesn't contain a clunky photo library management system or localized brush-based “photoshopping” tools aside from a spot heal tool, and we think it’s better for excluding these two things (see below). It's designed for working with the image as a whole and not trying to “photoshop” reality, but instead to create emotional, reusable styles.
Q: What does CameraBag have that Lightroom doesn’t?
Many things! Here are some of our top picks:
- Video support (CameraBag Pro only): Everything you can do to an image in CameraBag Pro, you can do to videos with the exact same tools. This is ideal for wedding photographers or anyone else who wants to develop a signature style and apply it across multiple photos and videos.
- Advanced Tools: CameraBag contains many tools and adjustments which simply don't exist in Lightroom. These include curve-based color adjustments (see, for example, CameraBag’s Coloring Curve, Hue Exposure, and Hue Saturation adjustments), filtered black and white conversion, advanced grain controls, and more.
- Layerable adjustments/presets: Every adjustment applied in CameraBag appears, in the order they’re applied, as a tile in the bottom tray. It's trivial to rearrange them, toggle them on and off, go in and edit their values, etc. Applying grain before or after sharpening can make a huge difference in the final look of an image - there's no way to control which happens first in Lightroom.
- Hundreds of high-quality included presets: CameraBag includes hundreds of professionally-focused editable presets. These include analog film emulation, popular modern digital styles, grain packs, color correction toolsets, and specific filters to help with different portrait and landscape scenarios.
- Easy watermarking: Lightroom Classic has an antiquated watermark dialog, but recent Lightroom versions include no watermark support. CameraBag lets you include a watermark in any preset, or saved as its own preset that you can then layer on top of any other adjustments or preset, easily visible and adjustable in the main interface.
- Preset-based workflow: Unlike in Lightroom, CameraBag presets are front-and-center, fully layerable, integrated into the main interface, and easy to browse, load, and save. Photographers can apply presets to both photos and videos as a one-click solution or as a starting point, further adjusting per image as needed. With any loaded preset, you can see exactly which adjustments are included at a single glance.
Q: Why might an existing Lightroom user also want to own CameraBag?
Many Lightroom users will find specific useful tools in CameraBag that they’ll want to use in addition to or instead of their Lightroom workflow (like, for example, using CameraBag’s more advanced film grain controls to batch apply grain, perhaps after exporting from Lightroom). Others will be drawn to CameraBag Pro for video processing, or simply to use some of CameraBag’s hundreds of included built-in presets for specific situations. Many may find that they like Lightroom for some specific tasks, and CameraBag for others, perhaps for quicker edits on something outside of their preferred Lightroom workflow.
Q: How does CameraBag compare to Lightroom on price?
Lightroom is $120 per year and only works while your subscription is active. CameraBag is far cheaper, at $35 for CameraBag Photo and $59 for CameraBag Pro, and requires no subscription: you own any version you purchase, and it will keep working forever. In addition, you get a year of free upgrades to newer versions. The exception is on certain app stores (such as the Mac App Store) where this model is not supported, and where inexpensive subscriptions are necessary to allow us to make continual updates.
Q: Is CameraBag a poor man’s Lightroom?
No! CameraBag takes a different approach to photo editing than Lightroom (less focus on photo management, more focus on a bigger set of intuitive tools and a preset workflow, plus video editing with CameraBag Pro). There are many powerful tools and abilities in CameraBag that you can’t find in Lightroom, and CameraBag is extremely focused on making all tools and its workflow more intuitive and faster to use.
Q: For whom is CameraBag a better option than Lightroom, if they can only choose one?
If video is an important part of your media processing, there’s no question—CameraBag Pro handles videos just as well as photos, and Lightroom doesn’t. If you don’t want or need Lightroom’s photo management system or “photoshopping” tools, we believe CameraBag offers a much more efficient, powerful, and joyful photo editing experience. Especially for those who need to process many photos and videos, like wedding photographers/videographers and social media managers, with CameraBag’s focus on intuitive tools and an efficient preset workflow. Not having to pay for an expensive monthly subscription doesn’t hurt either. Those who do their work on a laptop will find CameraBag’s dramatically lower resource usage a lifesaver.
Q: What is an example of a tool in CameraBag that is more intuitive and/or more powerful than a similar tool in Lightroom?
Tone curves are a good example of something that is much more powerful and at the same time easier to use in CameraBag, as compared to similar apps.
- The algorithm we use for how the control points affect the curve (which comes from algorithms created for our 3D modeler, Silo) results in smoother curves that are easier to control without the curve going haywire.
- The Amount slider on our tone curves lets you set a low overall amount and then have incredibly fine control with large curve movements. It also makes it easy to dial up or down the overall strength of a curve’s effect without having to adjust each individual control point.
- The Method dropdown on our tone curves lets you use different algorithms for different needs (Value can preserve skin tones in portraits better, while RGB tends to affect saturation more but can be desirable for increasing both saturation and contrast in a landscape photo, for instance).
- You can layer on more than one tone curve in CameraBag, which is impossible in most other apps. This lets you, for example, use one curve to control shadows and another for controlling highlights, without having to try to fit all your adjustments into a single tone curve.
Q: How does CameraBag manage photos compared to Lightroom's library system?
In CameraBag, there is no built-in photo library. This is a strength! However you've organized your photos on your computer, that's how you access them in CameraBag. This makes it much easier to instantly work with photos without having to do an import step, and also makes it easier to then edit the same photos in other programs. It also uses MUCH less hard drive space. While editing in CameraBag, you can quickly move through photos in your current file’s folder to see them with the current adjustments applied, using the left and right keyboard arrow keys.
Q: What is CameraBag’s system resource use like compared to Lightroom’s?
The lack of a library system saves huge amounts of space. By default, Lightroom is set to use up to 25%(!!) of your hard drive's space for its special photo cache. CameraBag uses 0%. It also comes out on top in every other measurable system resource (as measured on a 2017 Macbook Pro):
Install space
Install space
- Lightroom Classic: 2.5GB (plus more for the scattered Creative Cloud files)
- Lightroom: 700MB
- CameraBag: 62MB
- Lightroom Classic: 1.44GB (not counting several hidden Creative Cloud processes that add hundreds more megabytes of RAM use)
- Lightroom: 1.84GB
- CameraBag: 470 MB