Character Modeling by Tony Jung Part 5
The Eye Region
The technique I am doing here is something new I have recently started with. In this case I am using the topology brush to create new geometry. The topology brush is such a great tool, and it has multiple usage. it is a powerful tool, yet it remains so easy to use. My background is strongly from an illustrative side so I LOVE this tool, because I can quickly sketch in new geometry or fix certain areas in my mesh, without being destructive to my mesh. I give props to Dave Cardwell from Weta for the idea, but my hat goes off to the Nevercenter guys for bringing to reality this great revolutionary tool, while keeping it simple for users.
Here we go with creating the eye region:
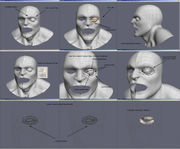
I start creating some edges and tweaking the shape. I then create a sphere and subdivide it 2 times. After that I RCM(refine control mesh) the sphere. The reason I do that is because I want the resulting mesh from the topology brush to match closely to a smooth spherical shape as much as possible, instead of a blocky sphere shape.
Once I scale and move the sphere which will serve as my eyeball into place, I check and setup the proportion for the eye region. I sort of did myself a disservice by posing the nose in an extreme expression. I need to setup my proportion for a neutral pose, so I will have to guesstimate where the nostril will be to setup my proportion.
Once all is good with proportions, I move on to the Topology Brush Options. I leave it at its default, and I make sure the offset is set to something greater than 0, as I want the eye lid to fit the eyeball with a bit of cushion and not right smack on the eyeball.
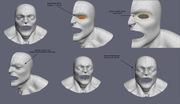
I multi-select the eyeball and the face, because I want to sketch new geometry based on the two surfaces. I follow the original topology lines and then I create the eyelid lines. I cross the lines for the upper and lower eyelid lines and I make sure they follow the original topology lines. I now start sketching in the other lines following once again the original topology lines. Once I have finished with the lines, I check in wireframe that my lines are good. I notice that I have a couple of mistakes, or missed lines, so I add more lines and MMB an existing line to continue its sketch to cross the outer ring. Once that is done I enter to create my eyelid mesh.
I check the new mesh, instance mirror it to the other side. If I am happy with it I'll move on or I'll go back into sketch mode and fix things up. I am happy with how the mesh can out so I'll move on. Ok, now the reason I chose to match the topology for the new mesh to the original mesh was because I want to merge the two meshes together as is demo below. I do another proportion check.
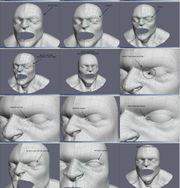
Okay, now to shape the eye region. Once again we are working with a pole topology, and I know right off the bat I need more definition to shape my eye, so I ring select->connect->bevel. There is some unwanted bulkiness, so I once again select a generous amount of vertices and smooth a few times to smooth out the region. Now the stuff after this is pretty much self-explanatory.
Final shape and mirror to check out the mesh.
Text and Images Copyright © 2004 Tony Jung.


