Character Modeling by Tony Jung Part 6
More Facial Detail
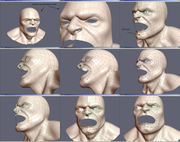
This part went by pretty quickly. I decided to give some flesh color to the character and model the cornea. I like to model the cornea, because one, I can spot if I made a mistake with the eye lids; two, to spot if I framed the eye incorrectly, sometimes you might not notice after the fact, that the your eyes come out looking cross-eyed. You can contribute this to bad framing. Three, it gives the character some "life".
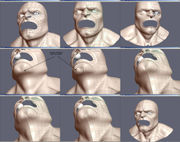
I added detail to the eyes region as you can see from the first 2 images. Then I went and reworked the chin, since it is obvious by now the type of character I am going for here is a brute-type, so a nice round chin isn't going to cut it for this type of character. I want to get a squared-in dimpled chin.
Here is more of the same, but I come to a 5-point problem, with an obvious creasing problem. Now 5-point doesn't necessary mean just a 5-point, you could have more like in this situation, it is generally a term of in which such creasing problems become visible due to having more than 4 merging edges into 1 point. Here I just rework the edges and push the 5-point into a flat surface area, which will have very little or no-deformation.
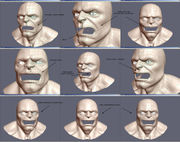
This series of images is pretty much self-explanatory, on how I am forming the lips.
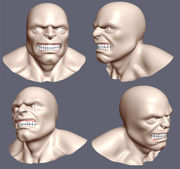
Modeled the gums and teeth to see the full effect:
Text and Images Copyright © 2004 Tony Jung.


