Difference between revisions of "Character Modeling by Tony Jung Part 7"
| Line 1: | Line 1: | ||
'''The Ear''' | '''The Ear''' | ||
| − | I am finishing things off with the ear. | + | ''I am finishing things off with the ear. |
| + | |||
I start off with adding edges so I will have enough definition to form the shape of the ear. I also start things off by creating a pole-type topology for the ear. I connect and then rotate the newly-created ring. | I start off with adding edges so I will have enough definition to form the shape of the ear. I also start things off by creating a pole-type topology for the ear. I connect and then rotate the newly-created ring. | ||
Revision as of 12:15, 2 July 2008
The Ear
I am finishing things off with the ear.
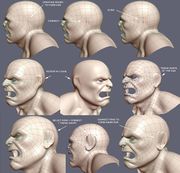
I start off with adding edges so I will have enough definition to form the shape of the ear. I also start things off by creating a pole-type topology for the ear. I connect and then rotate the newly-created ring.
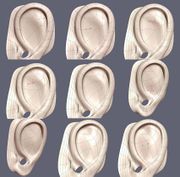
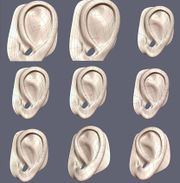
Now since I have the basis for the ear, I break it from the main mesh. I do this for 2 reason, one I will need to add more edge definition to the ear mesh to model the shape of the ear, two I don't want to rework the surrounding topology as I build the ear to compensate for the newly added edges. This would causing too much of a mess that needs cleaning up while I model. Once again, less things that I have to deal with the better. In the last image you can see that I RCM(refine control mesh) the ear mesh to get me my added definition.
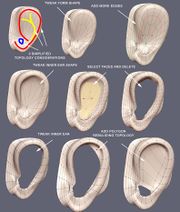
Here is where I really start working on the ear. Now the first thing that I do, which is consistent with what I do when modeling anything is consider the edge flow/topology in the simplest manner possible. I break down the flow into 3 flows, one the overall ear is sort of a number 9 shape. The second is a curving Y shape and the third is just a pole shape. With these 3 edge flow/topology goals in mind I start working the flows/topologies in to the ear mesh.
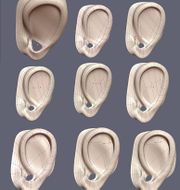
Now in these series of images, I am reworking the edge flows, I am using edge spin a lot here, you can see how I use it in the third top image the 3 edges that are now flowing more with the number 9 edge flow I had in mind.
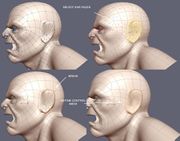
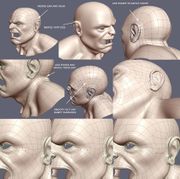
Once I am done with the ear I merge it back with the head mesh. I merge vertices and I add in new edges into the head mesh to deal with the extra added edges from the ear. I use smooth to smooth out some bumpy spots. It is much easier and less work to smooth out the rough spots and compensate with extra edges to match the edges in the ear. This is why I prefer to build my ears this way, I have my final ear shape, so I only need to "clean-up" and match it to the main mesh only once. If I had modeled the ear right on the main mesh, I would have had to "clean-up" while I model the ear more often that I would like, which just slows my modeling.
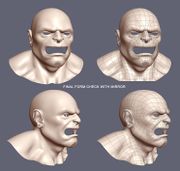
So that is it for the head. In final thought, I would recommend taking a look at the wireframe of the head and examining the edge flow, then go back and rereading the sets of tutorial and recognizing how they came to be. If you look at the finished head and the original basic head, you will see that not much changed in terms of you established basic topology flow, the foundation. Like I stated, start simple with a solid foundation and build your way up, getting your basic topology flow established will go along way in helping you realize your modeling quickly, efficiently and less frustrating in the end.
Text and Images Copyright © 2004 Tony Jung.
