Difference between revisions of "Character Modeling by Tony Jung Part 12"
| Line 18: | Line 18: | ||
Here I start to model the big toe. Like with the hand I create some polygons usually 2 to extrude. | Here I start to model the big toe. Like with the hand I create some polygons usually 2 to extrude. | ||
[[Image:Tony_jung_tutorial_12_005.jpg|thumbnail|none]] | [[Image:Tony_jung_tutorial_12_005.jpg|thumbnail|none]] | ||
| − | [[Image: | + | [[Image:Tony_jung_tutorial_12_006.jpg|thumbnail|none]] |
[[Image:Tony_jung_tutorial_12_006b.jpg|thumbnail|none]] | [[Image:Tony_jung_tutorial_12_006b.jpg|thumbnail|none]] | ||
Latest revision as of 15:05, 3 July 2008
The Foot
The foot is a tricky thing. The construction isn't all that hard, but making it work and be believable is. The foot needs to have a sense of weight, stability and strength. But if you plan on deforming the foot, you need to also set it up properly with toes spaced far enough so the weighting of each toe isn't too problematic, as well as not modeling the foot looking like it has too much weight on it. It is really a balancing act, something a modeler needs to envision how the foot will eventually need to look like, while modeling it in a very unnatural neutral pose.
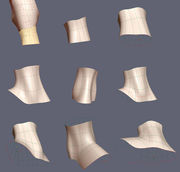
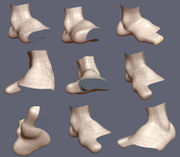
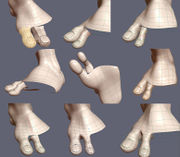
Like usual I like to BREAK off an area of the mesh to form newer pieces. I select up to an area that won't be changing so I also have a guideline to follow with regard to proportions and shape.
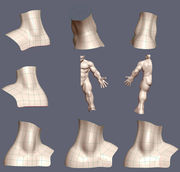
I quickly build the heel and the instep of the foot. I refer back to my main mesh to see if the foot is going in the right direction of shape and proportion. I'm going for a really big-ass foot, so so far so good. Some redirection of edges to define the inner ankle of the leg.
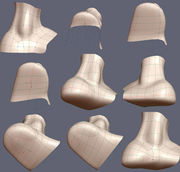
I fill in the bottom of the foot by selecting vertices and creating a polygon. Also I am reworking the shape for the heel in a rounding topology.
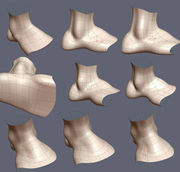
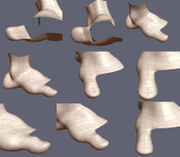
Forming the area for the big toe, with some redirection of edges using spin edge.
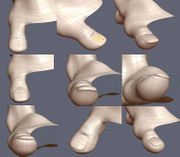
Here I start to model the big toe. Like with the hand I create some polygons usually 2 to extrude.
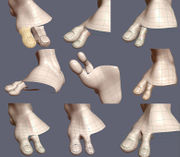
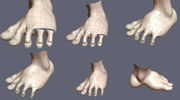
Once I build one toe, I copy the mesh to use for my other toes. Since the other remaining toes are different from the big toe, I have sculpt the shape. Once I make my changes to the other toe I merge it back to the foot mesh and make the appropriate additional of edges and modifications to match the edges and keeping the results in quads.
I repeat the process by copying the second toe and making rotation changes and some tweaks. I have to keep the toe loose and not too curled up, a neutral like pose for rigging. I merge back, merge vertices, adding additional edges to the foot and so on.
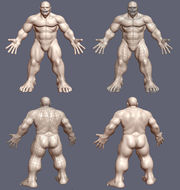
I merge the foot back to the main mesh and I make some changes. For one the toes are way too thin, so I bulk them up by scaling and some soft tweaks, but I still make sure I keep the toes farther apart as needed for rigging and maintaining their neutral pose.
So that is it for the bad-ass brute, well he's not really BAD, he's just modeled that way.
There will be some minor changes to the body mesh, stuff I will spot during the rigging phase. Once the rigging is done I will be moving on to adding detail to the character with Zbrush to really make the character pop and texture mapping. Adding clothing and accessories. And finally to posing, staging and rendering.
Text and Images Copyright © 2004 Tony Jung.
